

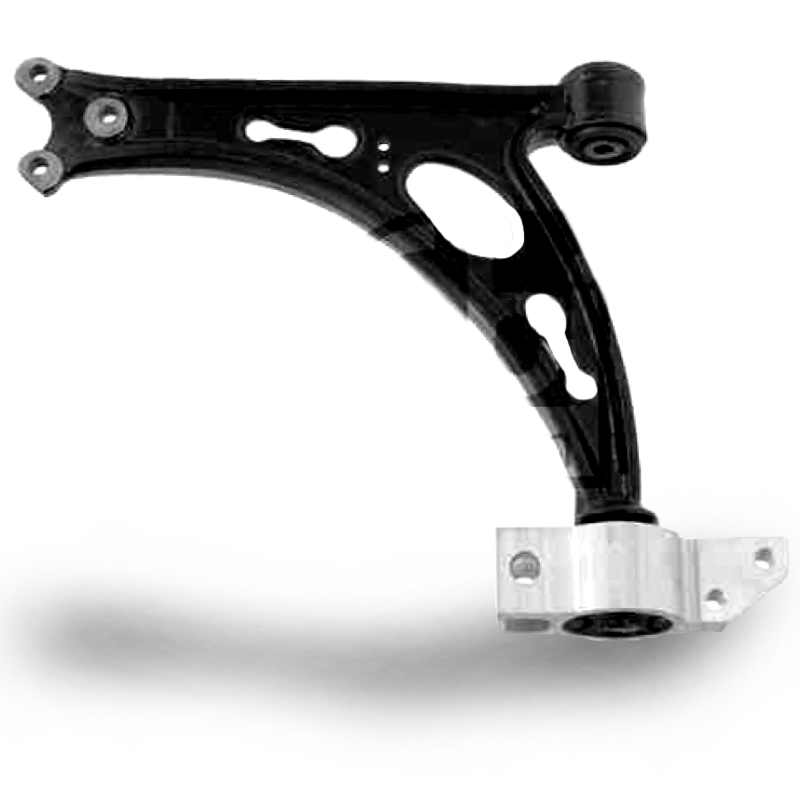
The wishbone is part of the steering geometry, connecting the front wheel with the car’s chassis. The wishbone is very movable with a certain sideward play, enabled by its bearings. These bearings or bushings consist of a solid rubber muff, fixedly pressed onto the wishbone. When the rubber becomes brittle through external influences or excessive ageing, the wishbone loses its stability.
Wishbone defect
 The wishbone is a very massive component made of welded metal. As long as it is not excessively strained by pressure or corrosion, virtually no damage can occur. Its weak point are the pressed bushings. Although made of massive rubber, they can wear over time, developing cracks or losing elasticity. As a result the control arm is no longer properly connected to the front wheel and its movability is impaired. Instead, the worn wishbone causes unwanted play of the wheel. Following symptoms could occur:
– the car no longer keeps its track (misalignment).
– every bump in the road causes noise.
– the steering is very “spongy”.
– the car has an increasing tendency to swerve.
– screeching tyres.
– increased, one-sided wear on the front tyres
All in all a worn control arm is more than just a nuisance. It causes expensive damage and severely impairs driving safety. Therefore this component should be replaced without delay.
Wishbone | Premium qualityavailable now for £ 24,98Go to shop ⇒ |
What do you need?
For the successful replacement of a wishbone you need the following:
|
1 car lift 1 gearbox jack 1 torque spanner 1 spanner set 1 ring spanner set, cranked 1 jig saw (for the bushing) 1 new wishbone and 1 new wishbone bushing |
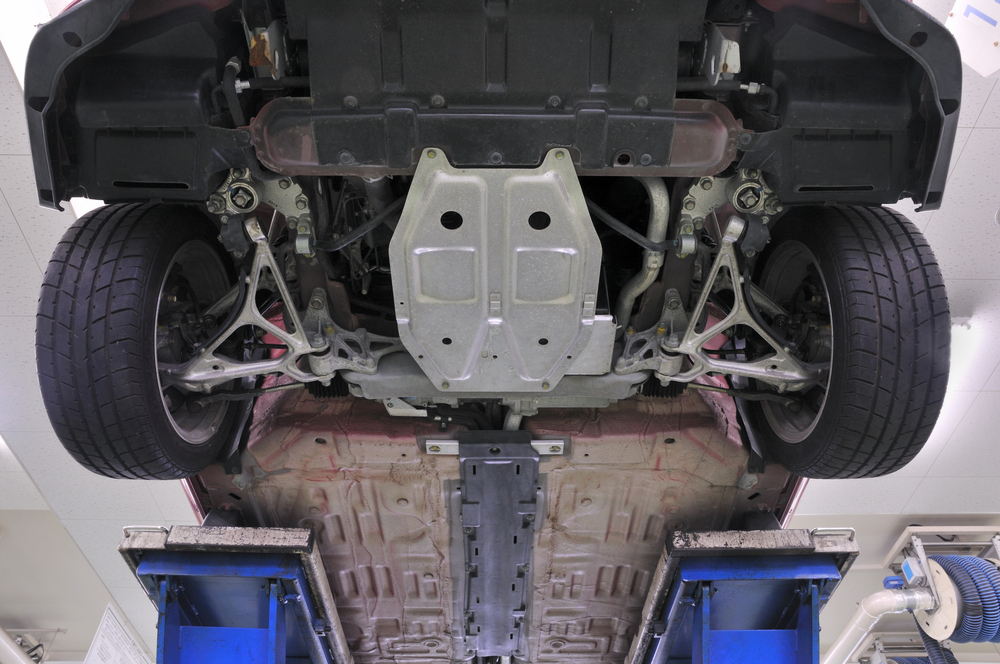
Spotting a defective wishbone
 A defective control arm or a defective bushing is easy to identify: the thick rubber ring is porous and cracked. If the defect is clearly affecting the driving quality the rubber bushing has probably torn completely. Moving the wishbone up and down with a lever will clearly show the cracks.
Bushing and wishbone are tightly connected and therefore cannot be replaced separately. For security reasons the bushing is fixed to the welded metal part. In case of defect, the entire component must be replaced. As control arm are very cheap, this poses no problem. Furthermore the replacement of an entire control arm is considerably easier than pressing the bushings in and out.
Safety first!
 Replacing the wishbone requires working under the car. A car lift is ideal. If this is not available, the car can be repaired in jacked position on condition of additional safety measures:
– Never secure the car with a simple car jack only.
– Always place suitable axle supports under the car!
– Pull the hand brake, shift gear and place safety wedges under the rear wheels.
– Never work alone.
– Do not use provisory solutions such as rocks, tyres, wood blocks.
Step by step DIY-guide
|
This is a general description of the replacement of wishbones and not an actual repair manual. We emphasise that the replacement of a control arm is a task for a certified car mechanic. We do not accept any liability for errors occurring as a result from imitating the described steps. |
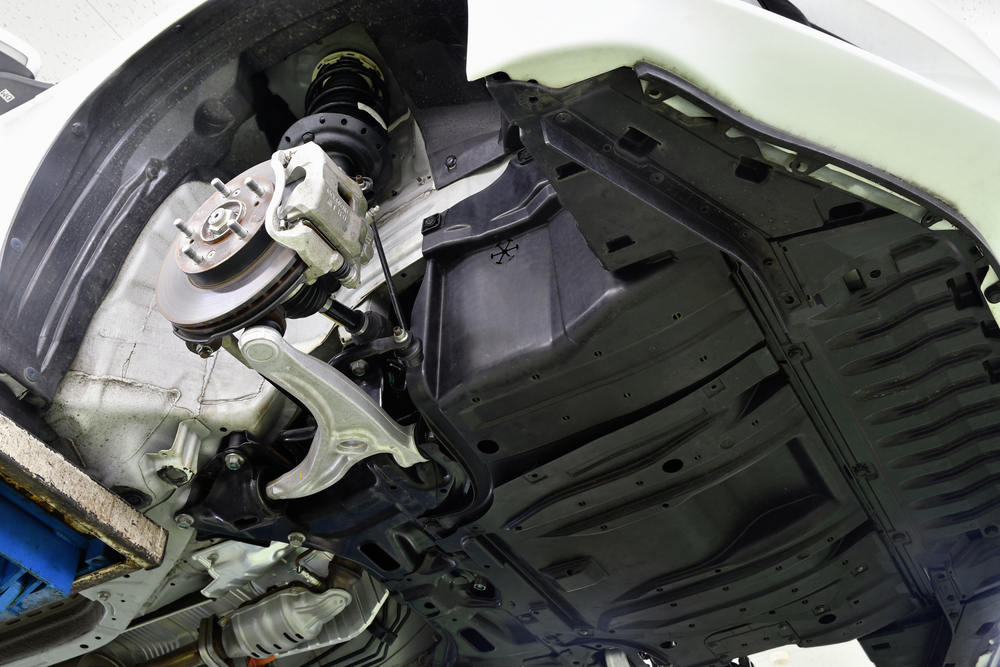
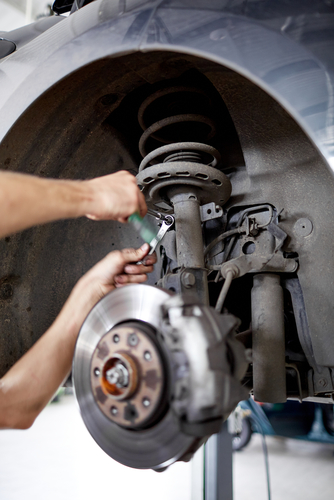
1. Removing the wheel
|
2. Unscrewing bolts
|
3. Disengaging the wishbone
|
4. Installing a new wishbone
On no account tighten the chassis bolts of the control arm as long as the front wheel is still hanging in the air. A control arm as a rule is not tightly fixed until the shock absorber of the front wheel is deflected and under normal pressure. |
5. Relieving the front wheel
|
6. Installing the wheel and checking alignment
|
7. Replacing the control arm bushing
TIP: A defective control arm bushing can be removed with help of a jig saw. Most times a single cut transversely through the rubber right to the wishbone pin is sufficient. Now, the bushing should be sufficiently free of tension to pull it from the wishbone. Mounting the new bushing on the pin is another challenge. A popular DIY method is hammering it in with a large spanner and a couple of hammer blows. We do not recommend this procedure. A gentle sliding in with help of a vice is much better for both components and considerably extends the life span of this component, its replacement being very difficult. |
 After securing the car on the lift, the wheel is removed on the affected side.
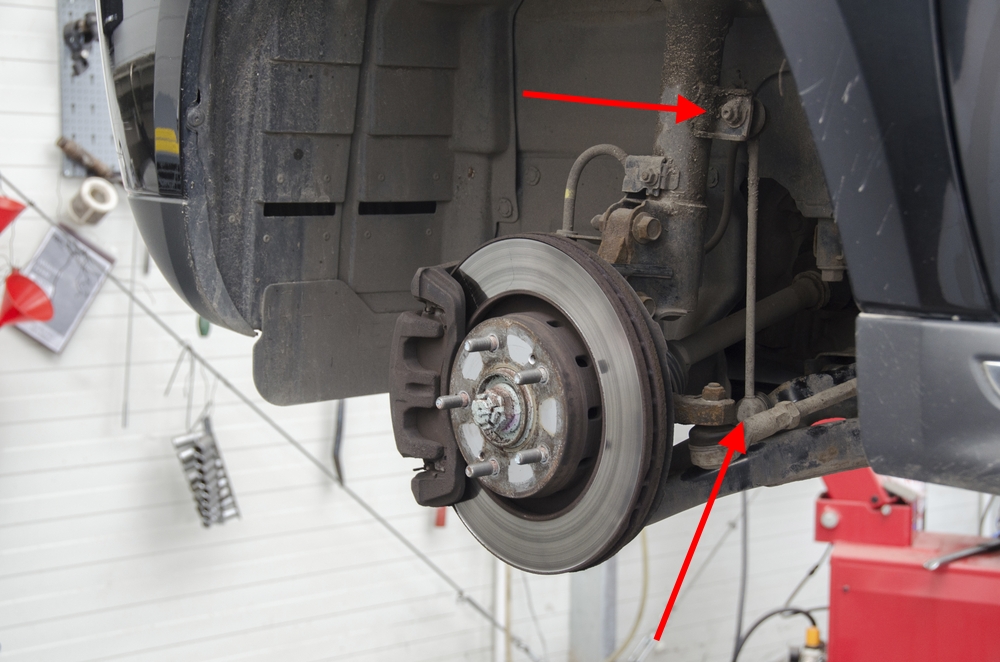 The connection between control arm and car depends on the type. Common is a screw connection with the vertical coupling rod, three bolts on the wheel and two bolts on the chassis. One chassis bolt is vertical, the other one horizontal. Fix the nut with the cranked ring spanner to unscrew the vertical bolt. Now the bolt can be unscrewed at the bottom.
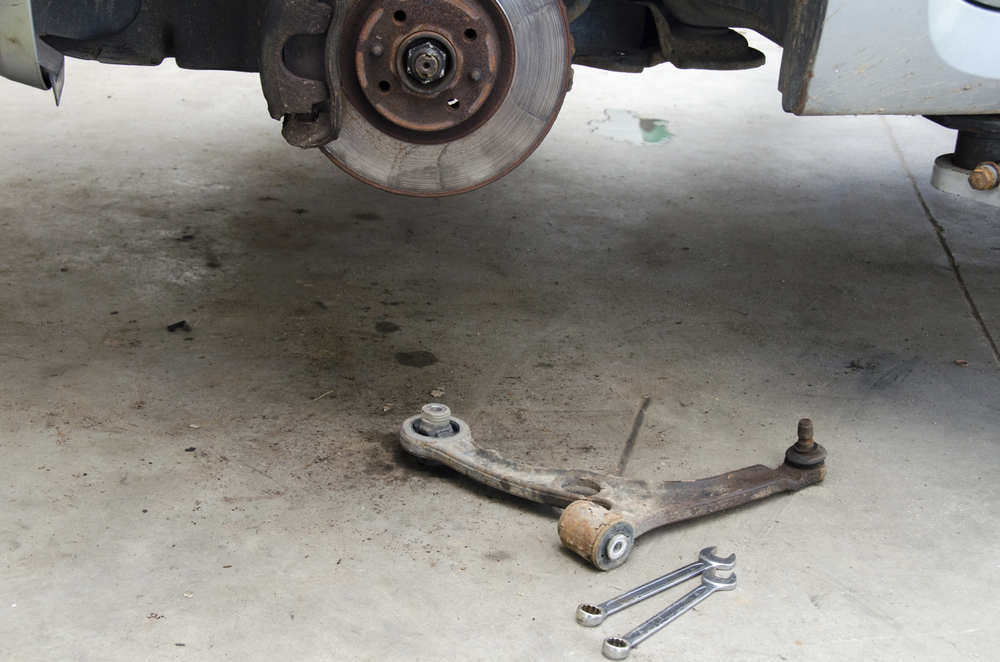 First disengage the wishbone on the wheel side. Then pull out the horizontal chassis bolt. The wishbone now lies free.
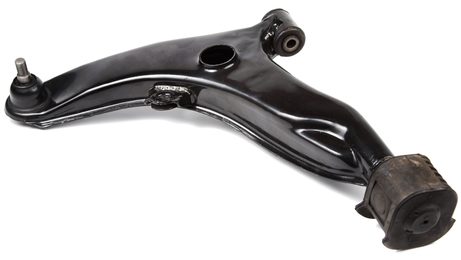 The new control arm is installed in place of the old component. First connected it to the wheel. The three bolts on the wheel hub are initially secured with just a few turns as the component requires a certain play for further assembly. Now the horizontal chassis bolt is inserted and screwed in with 2- 3 turns. Inserting the vertical chassis bolt can be somewhat tricky. Nevertheless, work with care and skill to prevent damage to the pressed bushings of the new control arm.
 Now the front wheel is jacked up with the gearbox jack until the shock absorber is 50% deflected. This is its normal driving position. The wishbone bushing is under normal tension and not excessively strained. Now, all bolts can be tightened with the prescribed torque.
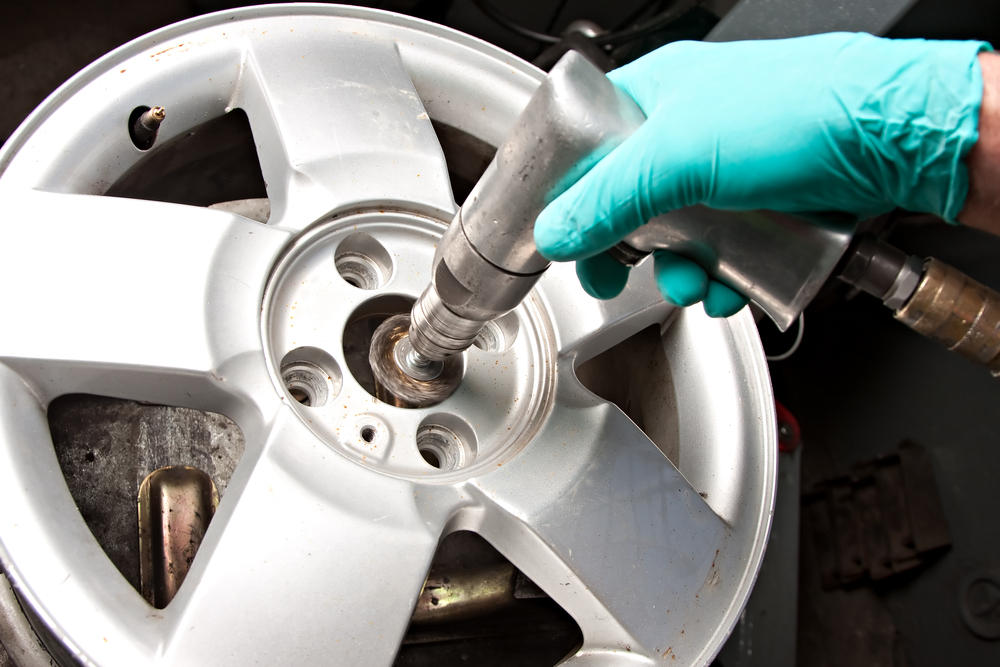 Ultimately the front wheel is installed and fixed with the prescribed torque. Replacement of a wishbone always implies intervention in the steering geometry, the car must therefore subsequently be brought to the garage to
 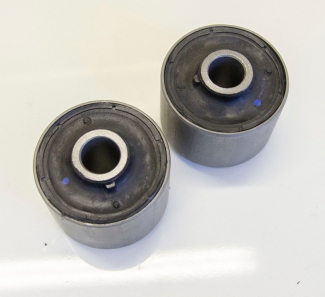 The bushing does not always require replacement. Although this separate part is rather cheap, its replacement is very complicated as it is only possible with special tools. If you do not have the tool ready, the control arm should only be replaced as a whole with its bushing pre-mounted.
Costs
A single new wishbone starts at ca. 15 EUR (± £13). Purchasing a complete set is considerably cheaper. A complete set for the front axle includes a
– control arm
– coupling rod
– ball joint
– tie rods
– control arm bushings
– support joint
for both sides costs only 80 – 100 EUR (±£71 – £90). The effort for replacing all these parts is only slightly more than for replacement of a single wishbone. After replacement of any of these parts, the car has to have its alignment checked anyway and therefore it is worthwhile considering replacing the entire axle in one go. Ultimately, these components age simultaneously. If the wishbone starts to fail, all other parts in this area are likely to follow soon. By complete replacement a defined new starting point is created, avoiding problems in this area for many years.
Foto: woverwolf, Alraun, dreamnikon, Vasiliy Koval, Alfa Photostudio, Corepics VOF, svariophoto / shutterstock.com


 (11 votes, average: 3.36 out of 5)


")


