

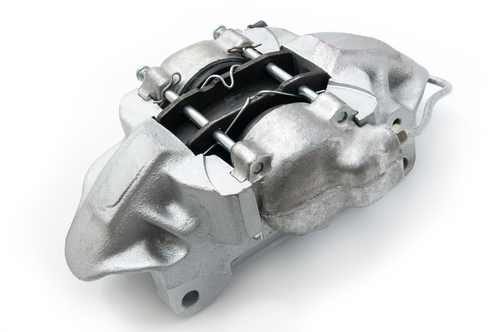
As a component, the brake caliper sits in the back row. It is not even visible on a car with common wheel rims or hub caps. So why bother painting it at all? Read here how to upgrade the caliper and make your car look good.
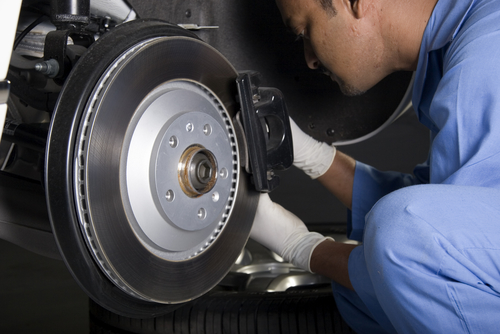
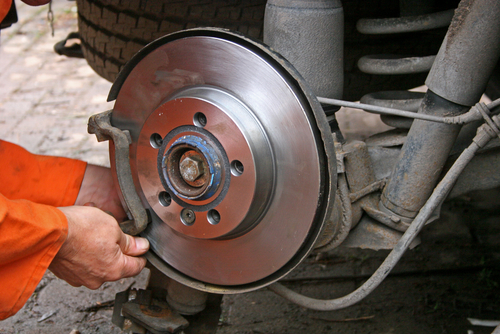
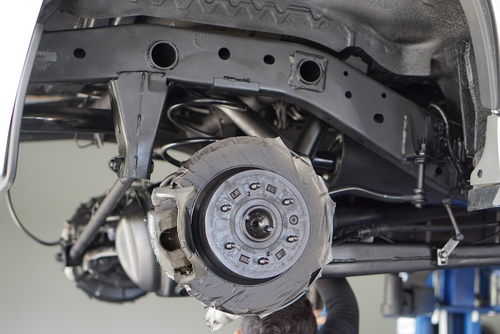
Therefore, you only need to have a closer look at the wheel rims. Their construction is generally very filigree and delicate. This saves weight and allows a good view of the wheel mechanism. You can clearly see the caliper hanging there: greyish-black, dirty and rusty. Between the beautiful aluminium wheel rims and the clean brake disc it stands out as grimy. Especially if you invested in the look of the car, an unpainted brake caliper causes embarrassment. Retail and industry have now adapted to this challenge.
Only one way is right
 There are several options for painting the car. Spray-painting and wrapping are the common procedures. If the budget is tight and the car is merely a mode of transport, the roller brush can be used. For a brake caliper there is only one right way to upgrade it: with the paint brush.
The complex mechanism surrounding the brake caliper does not allow for any other procedure. Wrapping makes no sense as the high temperature of the brake caliper would cause the foil to melt. Spray-painting is not really recommended as the coating is too thin. Furthermore you run the risk of spray-painting the sensors and rubber bushings as well, which could considerably impair the function and life span of these components. Only the paint brush and a steady hand guarantee proper application of the paint.

New Brake Calipersup from £ 19,25Go to shop ⇒ |
Plan 6 – 8 hours for painting the brake calipers.
What you need
 Retail now offers complete painting sets especially for brake calipers. The equipment of these sets differs. A complete set contains:
– brake cleaner
– two-component coating consisting of paint and hardener
– mixing bowl
– paint brush
– disposable gloves.
If the set contains only one bottle of brake cleaner, we recommend buying at least a second one. For older and very dirty brake calipers you additionally need:
– a hard paint brush or a dish brush
– a steel brush
– angle grinder with brush accessory
– brake cleaner
– sanding paper or abrasive pad
– masking tape
– mouth cap and protective goggles.
– extra paint brush and mixing bowl.
Preparation determines the end result
 Preparation is the determining factor for the ultimate result of paintwork. The more effort and care was invested in the preparation of the car, the easier the actual painting will be and therefore the better the ultimate result. Preparation is the determining factor for the ultimate result of paintwork. The more effort and care was invested in the preparation of the car, the easier the actual painting will be and therefore the better the ultimate result.
|
|
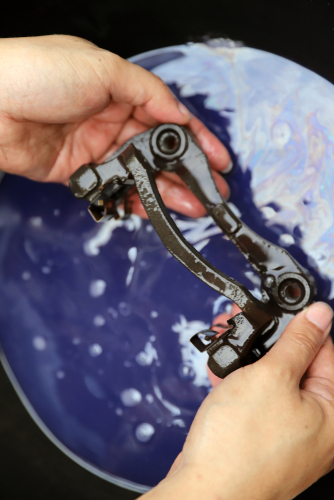
The preparation consists of three steps: – disassembly – cleaning – taping off Do not worry: a brake caliper doesn’t need total disassembly for painting. Nevertheless it requires some attention before you start attacking rust and dirt with an angle grinder. |
|
Special care is required for: |
 The bushings and the ducts they protect cannot be removed. Nevertheless an eye should be kept on them during the entire painting process. If anything should happen to them, you risk a serious defect. A damaged bushing loses its lubricating grease allowing water and dirt to penetrate. The water causes the ducts to rust. Dirt causes the brake caliper to jam. The result is a jamming brake, functioning on only one side. This could lead to a very dangerous road situation and must be repaired immediately. However, this is not cheap. Generally an entirely new brake caliper must be installed. The bushings and the ducts they protect cannot be removed. Nevertheless an eye should be kept on them during the entire painting process. If anything should happen to them, you risk a serious defect. A damaged bushing loses its lubricating grease allowing water and dirt to penetrate. The water causes the ducts to rust. Dirt causes the brake caliper to jam. The result is a jamming brake, functioning on only one side. This could lead to a very dangerous road situation and must be repaired immediately. However, this is not cheap. Generally an entirely new brake caliper must be installed.The sensors on the other hand, can easily be removed. The ABS sensor and the wear sensor of the brake lining can be pulled off and hung aside. Particularly the cable is important, here. It may not be damaged. Disassembling it effectively prevents this risk. |
Scrub until you cry
 A brake caliper is exposed to particularly strong pollution. Especially the abrasion of the brake linings settles on it as dust and gradually cakes. Abrasion from tyres and dirt from the road add to this. The caking layer can not simply be wiped off and needs to be removed by force, chemicals and if necessary the right tool. The layer is rather unhealthy. A brake caliper is exposed to particularly strong pollution. Especially the abrasion of the brake linings settles on it as dust and gradually cakes. Abrasion from tyres and dirt from the road add to this. The caking layer can not simply be wiped off and needs to be removed by force, chemicals and if necessary the right tool. The layer is rather unhealthy.Therefore: when cleaning the brake caliper, be sure to wear a mouth cap and protective goggles. Gloves are useful as well: paint can only be removed with solvent which is anything but nice to the skin. |
 Start by roughly cleaning with the steel brush after removing the bracket. Smooth surfaces can be cleaned quickly and efficiently with the angle grinder. Corners require manual application. On places which are dangerously close to the bushings, clean with scouring pad and plenty of brake cleaner. The brake cleaning fluid is very effective as well as very volatile. Therefore when cleaning the brake caliper always ensure adequate venting. As soon as you feel dizzy, interrupt the work and go into the fresh air. Start by roughly cleaning with the steel brush after removing the bracket. Smooth surfaces can be cleaned quickly and efficiently with the angle grinder. Corners require manual application. On places which are dangerously close to the bushings, clean with scouring pad and plenty of brake cleaner. The brake cleaning fluid is very effective as well as very volatile. Therefore when cleaning the brake caliper always ensure adequate venting. As soon as you feel dizzy, interrupt the work and go into the fresh air. |
 After the preparatory treatment with the grinder brush and the manual steel brush, rinse the brake caliper again thoroughly with brake cleaner, using a big paint brush or dish mop. These tools do not pose any danger to the rubber bushings. Nevertheless be particularly careful with the small rubber dust bellows. After the preparatory treatment with the grinder brush and the manual steel brush, rinse the brake caliper again thoroughly with brake cleaner, using a big paint brush or dish mop. These tools do not pose any danger to the rubber bushings. Nevertheless be particularly careful with the small rubber dust bellows.Clean all brake calipers before starting paintwork on the first one. |
Taping off – unpopular though sensible
 Experts’ opinions tend to differ on whether or not to tape off. You can never go wrong by doing so as it guarantees a clean result. For taping off painting tape is used. Everything that shouldn’t be painted, gets a protective cover. The brake disc is protected against paint spattings by some strategically placed painting tape. Experts’ opinions tend to differ on whether or not to tape off. You can never go wrong by doing so as it guarantees a clean result. For taping off painting tape is used. Everything that shouldn’t be painted, gets a protective cover. The brake disc is protected against paint spattings by some strategically placed painting tape.
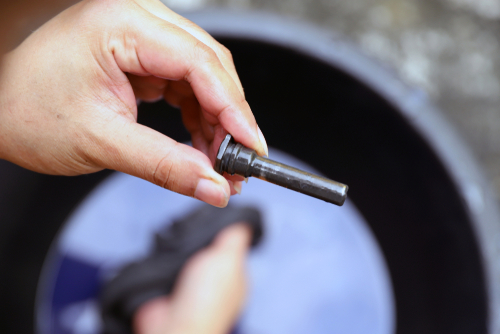
Especially the holes in the brake caliper must be plugged to prevent paint from running in. This particularly applies to the holes of the bracket. They can be reliably plugged with a piece of wire, a match or a toothpick. Brake caliper paint hardens quickly and becomes very viscous, so can only be removed at considerable effort after hardening. Therefore taping off makes sense, particularly for unexperienced painters. |
Mix coating according to instructions
| Brake caliper paint is provided as a two-component solution. Its mixing ratio is mentioned on the package. Be sure to stick to it very accurately. By using too much hardener, painting becomes difficult as it dries too quickly. By using too little hardener, drying lasts extremely long. After stirring leave it standing for ca. 10 minutes. The brake caliper is painted from the top downwards. Always take care that the paint doesn’t run. Painting with a brush always cause the paint strokes to show in the paint, which is compensated for with a second coating. Nevertheless, even when using the right mixing ratio, the paint for the brake caliper requires a long drying time. The second coating shouldn’t be applied until after 3 – 4 hours. Meanwhile the paint brush and the mixing bowl might have dried up completely. For making a new mix, a clean, empty yoghurt bowl is adequate. The second coating gives the brake caliper the finishing touch. Allow the second coating to completely harden out. |
Now, the car can be assembled again. Do not forget the sensors!
![]() Tip: The bracket can be touched up as well. When doing so in a contrasting colour, you give the exterior of your car a special touch.
Tip: The bracket can be touched up as well. When doing so in a contrasting colour, you give the exterior of your car a special touch.
Details make the difference
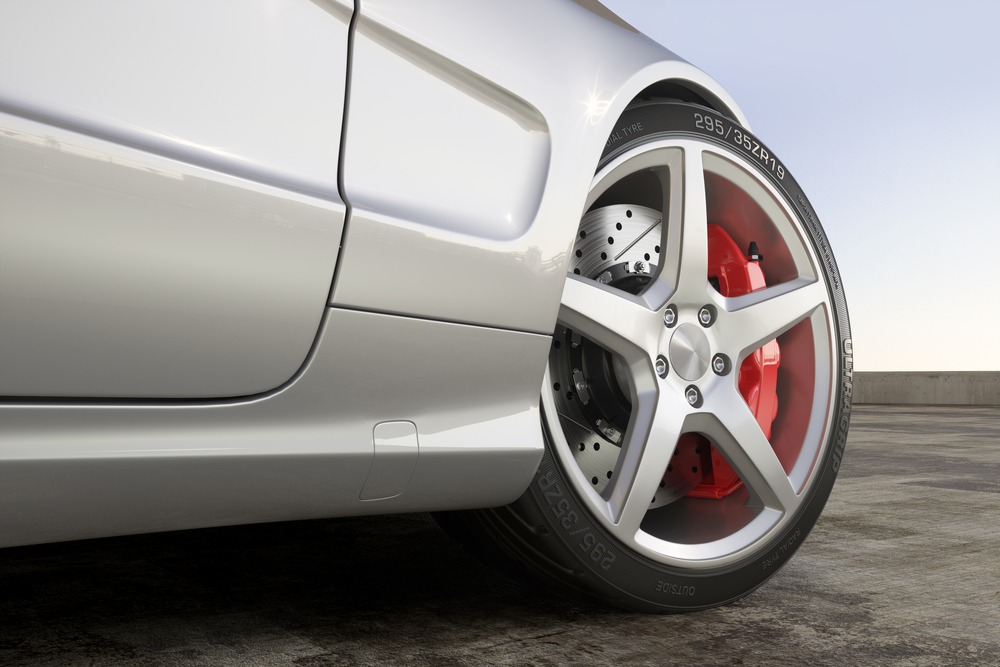 A painted caliper is a small but effective detail in the general exterior look of your car. With a bit of effort and cheap tools you can give your car an optical touch. And what is more: painted brake calipers raise the resale value of the car.
Foto: NONGASIMO, BACHTUB DMITRII, Pixotico, jennyt, ra3rn, Sudheer Sakthan, trinityfoto, MR.YURANAN LAKHAPOL, Ksander / shutterstock.com


 (13 votes, average: 3.46 out of 5)


