

Side window is a car component that is being usually neglected. For years it reliably performs its task. And then suddenly it disappears into the car door and all attempts to rise it only cause a nasty gnashing noise. This sounds dramatically; nevertheless this situation can be relatively easy remedied. Read here what you need to repair your side window.
Hidden construction with whims
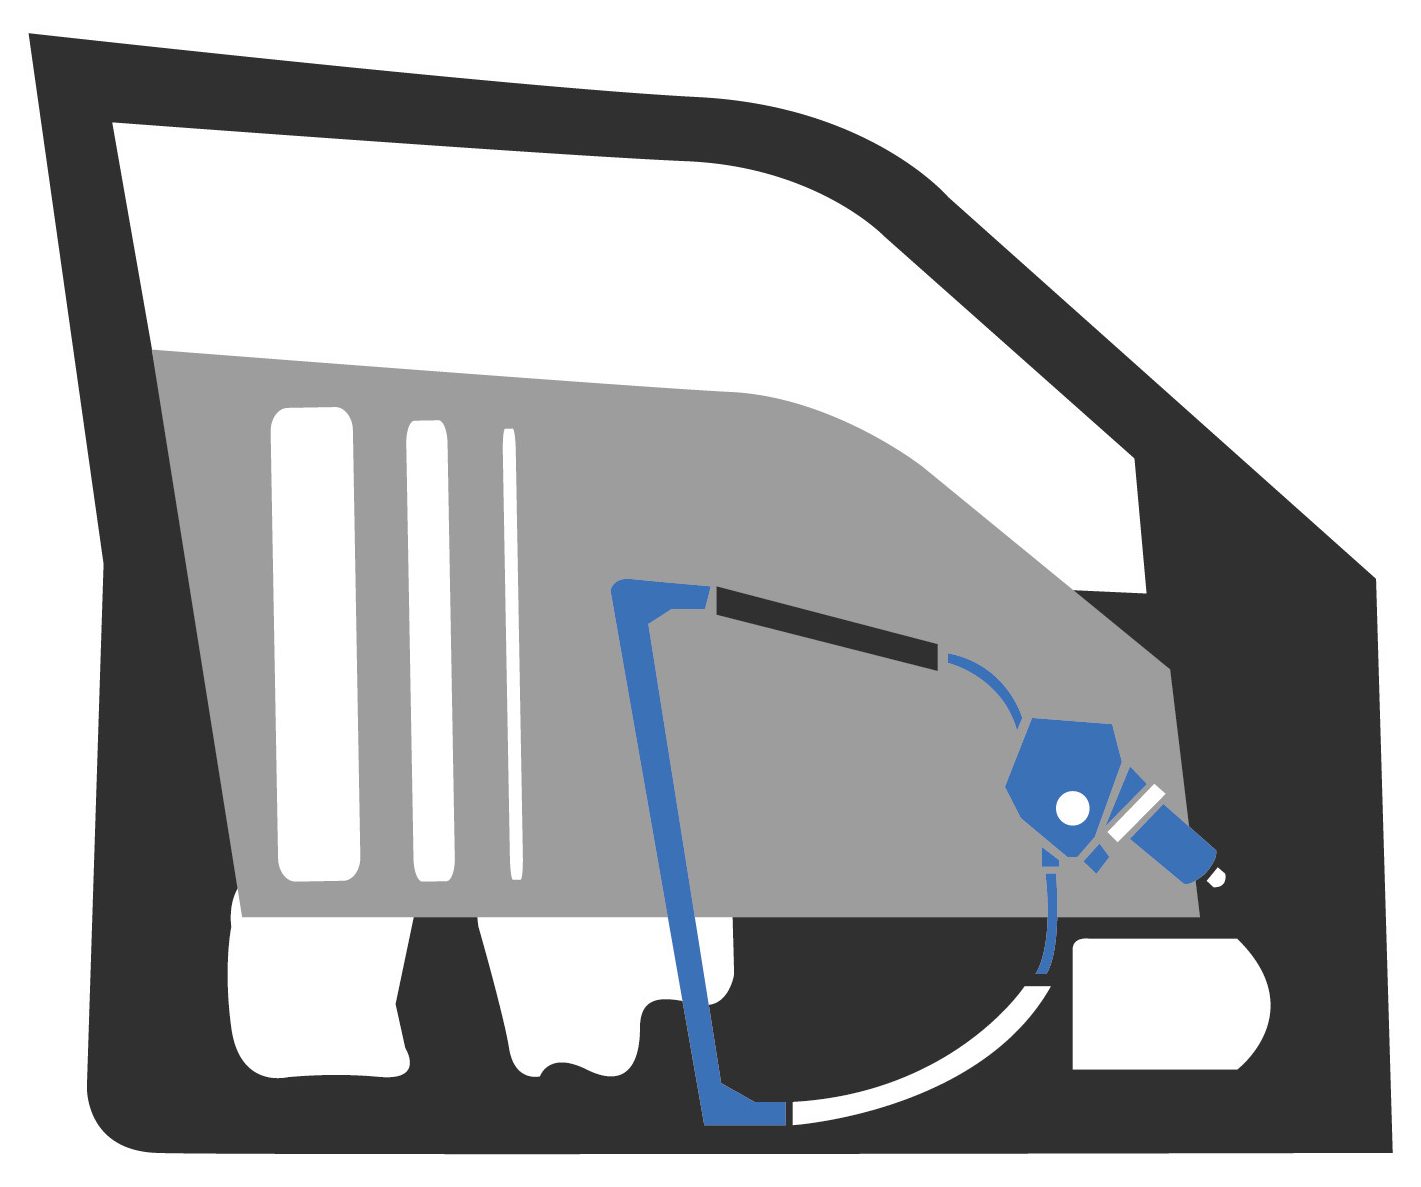
Technically, a side window is the same in all cars: the window is mounted directly or indirectly on a rail with two clips. The rail is connected to a levering mechanism, operated by a manual window opener or an electric motor. A window falling into the door has come off its rail. This can be repaired, though acting adequately and thoroughly is required.
Accessing the window without causing damage
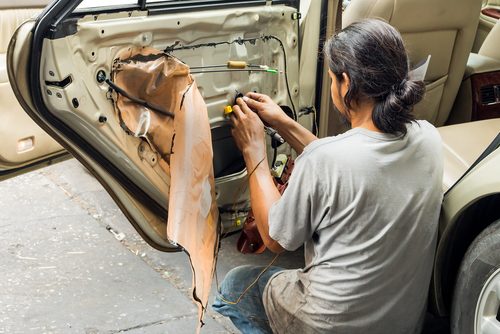
 To enable repair of the window guide system, the levering mechanism should first be exposed.
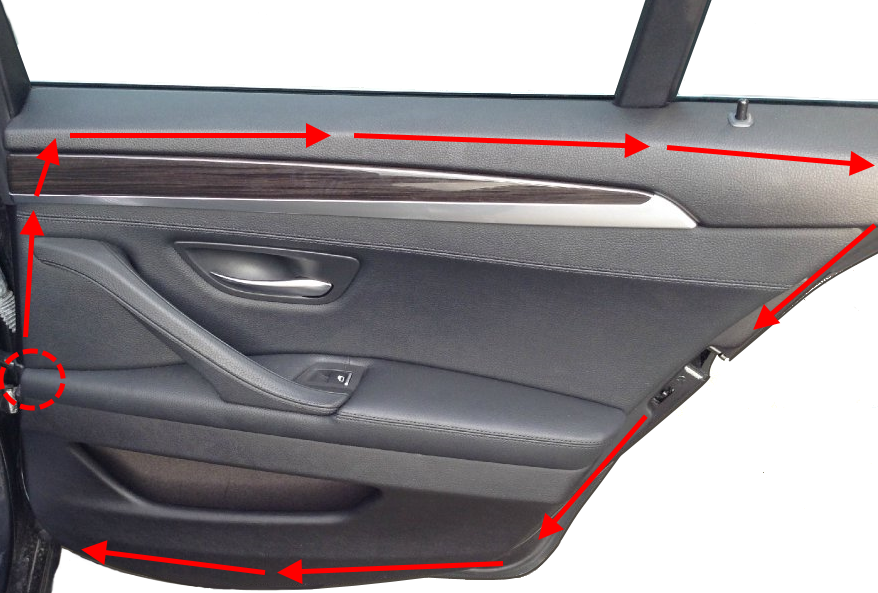
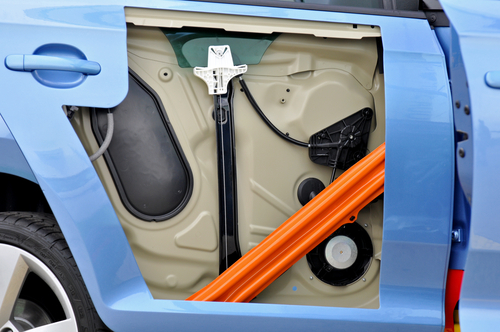
This is the first challenge: the mechanism is located behind the upholstery which needs to be removed first. The upholstery is kept in its place by:
|
– direct screw connections – window regulators – attached components such as handle, door opener, electric window opener and possible internal side mirror adjustment – clips – storage compartments |
- Screws can be loosened. The handle and the storage compartment are generally mounted with several screws. If the electric window opener is integrated in the handle, disassemble its switch first. It is often merely clicked in and can levered out with a broad screwdriver. Now, remove the cable terminals and nothing can go wrong when removing the door upholstery.

- Disassembling the window openers can prove a real challenge. Car manufacturers provided several systems. There are three standard constructions:
| – screw connection with a central bolt – mounting with a bracket – attachment by a mounting ring |
- The central bolt is the simplest affixation of the window opener. It is sometimes hidden under a protective cover, which can be removed with a flat screwdriver. Unfortunately car designers consider open and easily accessible screw heads unaesthetic. Therefore this simple, yet practical solution becomes rarer.
- For removing the bracket, the thin pliers is the best tool. It can prove to be quite difficult to get it out.
- The system with the mounting ring is a special solution, requiring some expertise. Many desperate DIY’ers almost broke their fingers by attempting to remove the window opener. This solution is nevertheless the simplest of all: the locking mechanism is in the plastic ring right under the window opener. Just slide it aside and the window opener can be removed with its lock.
- Ultimately the door upholstery can be removed. We recommend refraining from force. Often, several clips remain attached to the door, ripping the fabric cover. This is not easy to repair. The best and safest way to remove door covers without damage is the use of tools. These costs ca. £7 and should be available in every tool kit.
Essential foil
 The foil behind the door upholstery spanning the entire door interior is very important. It prevents rainwater from penetrating the interior. The foil should be pulled off or cut open to reach the side window levering mechanism. At reassembly, its re-attachment should not be forgotten, for which plain tape is adequate.
The window and its levering mechanism
The upholstery is dismounted and foil is removed, providing access to the the window. At first glance it is obvious that the window does not sit where it belongs: next to the guide rail instead of in it. No matter whether on guide rail or with clips: the window must be glued. The fact that it became loose is often due to failing putty. No tinkering is allowed for this repair!
 The connection between window and guide system should be able to withstand high pulling forces, due to the fact that the window doesn’t slide straight through the guide, but in a curve. Attempts with superglue, pattex or silicon only provide short-term success. The retail offers special window glue sets. Principally they are intended for the windscreen, but can be used just as well for the side window.
If the window is guided by clips, these can be stretched or broken. In this case, only original spare parts apply. If these are too expensive or no longer supplied, check the scrapheap.
 Tip: when visiting the recycler anyway, you can often bring back an entire window plus clips. This saves a great deal of glueing.
Prior to glueing the window, clean rail and contact surfaces as thoroughly as possible. A knife or scraper should be used. The remains of old glue should be removed as thoroughly as possible.
Subsequently, treat the guide rail and the contact surfaces of the window with a degreaser. Silicon cleaner or brake cleaner are suitable. When the connection between window and rails is adequately degreased, apply new window glue. Clips or mounting rail and window should be attached according to the specifications of the glue manufacturer and the total construct be allowed to dry. Afterwards everything is mounted – ready.
Window regulator is not functioning
 Another defect possibility for a side window occurs in cars with electric window operators. Their construction is different as they possess an electric motor instead of a handle bar. If the window can no longer be raised, systematic action is required:
|
I. Try the window opener: if you hear the motor hum, either the window has become loose from its guide or the engine is malfunctioning. Alternatively a belt or pulling cable could be damaged. The only way to make sure is disassembly of the door as described. II. If the motor makes no sound after pressing the switch, there is a power defect. The following checking steps should be taken. You will need a multimeter. |
| 1. Check fuses: these components age over time and can blow when overloaded. |
| 2. Check the wiring: first the switch cable is checked. On one of the three phases a 12 Volt current should apply. If this is lacking and the fuses are all right, a cable rupture is the cause. This is improbable but not impossible. The cable needs to be replaced. In view of safety, the earth cable should be checked as well. |
3. Check the switch: loosen the window operator switch but leave it connected to the power supply of the car. Connect the multimeter with the engine contacts. Operating the switch should cause 12 Volt current. If this is not the case and the switch cable is all right, the switch is defective. A repair can be attempted, but this is a delicate operation. A quicker method is the replacement by a new or certified second-hand switch. To make certain, try another trick: connect the window motor’s earth cable to the car’s bodywork. Then install a long cable from the battery to the engine plug and successively connect both contacts with the power source. If the levering engine now reacts, the fault is definitively in the switch. This procedure is also very practical if the window gets stuck halfway. It enables you to shut off the car. To make certain, try another trick: connect the window motor’s earth cable to the car’s bodywork. Then install a long cable from the battery to the engine plug and successively connect both contacts with the power source. If the levering engine now reacts, the fault is definitively in the switch. This procedure is also very practical if the window gets stuck halfway. It enables you to shut off the car.
|
| 4. Switch is all right: Now only possible defective element can be electric motor. As a rule it is quite expensive and therefore should be inspected thoroughly. Often, it is only a case of soiled contacts and their functioning can be re-established with help of brake cleaner and contact spray. If the motor smells burned, it is probably up for replacement. |
Have courage!
With a bit of know-how, patience and systematic action the side window can adequately be repaired. You can save a lot of money with a DIY attempt.
Foto: pathdoc, BriXio, Sukpaiboonwat, whitelook / shutterstock.com


 (8 votes, average: 3.50 out of 5)


